How to install SAP OpenUI5 on RASPBERRY PI

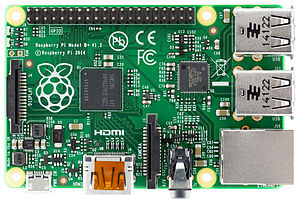
A few days ago I was checking my old hardware and I found a RASPBERRY PI (RPI) version 1 model B. It’s a very small computer module and this amazing hardware has two USB ports, 512MB of SDRAM, one Fast Ethernet (100 mpb/s), one HDMI, one RCA and a audio jack. In addition RPI requires an SD card to work as hard disk. It also has a small form factor measuring 65mm in length, it’s small as credit card and it works with a 5V/1.5A power supply. The processor is an ARM1176JZF-S with 700 MHz clock.

Raspberry_Pi_B-_top

There are some operational systems available for this version of RPI, but I choose a version based in Debian called Raspbian, it is optimized for the Raspberry Pi hardware and  it is supported by Raspberry PI Foundation.

I was learning about SAP Fiori frontend, as well as, I was developing an internal site at home in order to support some activities that I judge important for me. For example, sometimes I need to wake up some machine, monitor the surveillance cams and get alerts from nobreaks. Therefore I chose SAPUI5, because I could learn and enjoy my RPI at same time.

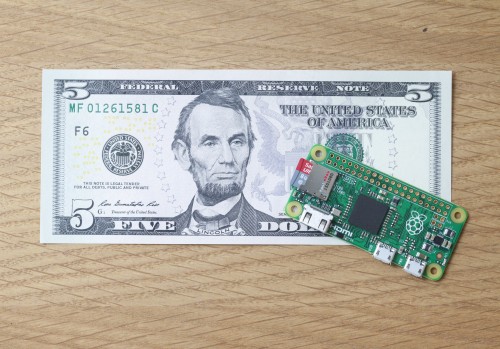
Recently I’ve started thinking about Internet of Things (IoT) and how to implement it at home. I’ve realized that Raspberry is a good choice for that kind of development, especially after the last announced version of RPI, the RASPBERRY PI ZERO, it’s smallest than RASPBERRY PI versions 1 and 2, and it’s cheapest than both.

Raspberry PI ZERO made in Wales and priced at just $5

Raspberry PI ZERO Feautures:

  • 1Ghz, Single-core CPU
  • 512MB RAM
  • Mini HDMI and USB On-The-Go ports
  • Micro USB power
  • HAT-compatible 40-pin header
  • Composite video and reset headers

    RPI Zero size

Lets take a look how to configure RPI to run OpenUI5 with Debian Jessie. If you are planning to use the Debian Wheezy keep in your mind that the configuration is a little bit different and probably you’ll experience some troubles.

  1. Preparation
    Take a look here in order to install the RPI with Raspbian, it’s very simple and you can do it on Windows, Mac or Linux. Of course you need a SD Card.
    The steps for configuration described below are for Debian Jessie and you can experience some troubles if you are trying to configure with Debian Wheezy installed on RPI.
  2. Install and Apache Web Server
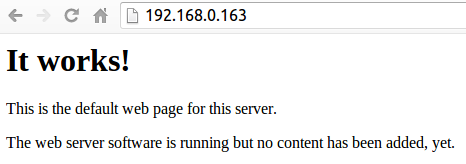
    After you have installed your RPI, install the Apache Web Server. Do not forget, your RPI must be connect to the Internet by Cable or WI-FI.On the terminal type the following command:

    sudo apt-get install apache2 -y
    service apache2 restart

    Test your apache typing the url on the browser http://<RPI IP>. Example, if the RPI is running on IP 192.168.0.163, type http://192.168.0.163

    You should see something like this:

    apache-it-works

  3. Deploy OpenUI5 on RPI
    The root document configured for APACHE 2.4 is /var/www/html/Go to the web root and create the folder /ui5.Terminal commands:

    cd /var/www/html
    mkdir /var/www/html/ui5
    cd ui5

    Download the OpenUI5 sdk package

    sudo wget https://openui5.hana.ondemand.com/downloads/openui5-sdk-1.32.9.zip

    Screen-Shot-2015-12-21-at-8.10.22-PM
    Unzip the package:

     sudo unzip openui5-sdk-1.32.9.zip
  4. Teste you environment

Go to browser and type the following URL http://<RPI IP>/ui5 in order to test your Openui5 SDK. Do not forget to REPLACE the <RPI IP>.

Example: http://192.168.0.163.

You must see a screen like this:

Screen-Shot-2015-12-21-at-8.31.56-PM


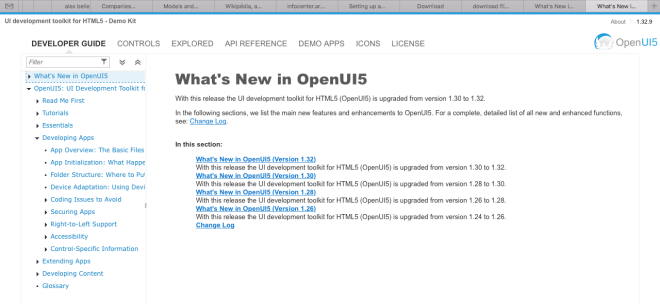
It is simple, isn’t it?

If you don’t have a RPI yet, you can test my configuration at https://www.zdecoder.com/ui5/

The same configuration can be applied for Ubuntu 14.04 with Apache 2.4.

Configuring MS ADFS 3.0 as Identity Provider for SuccesFactors

Many companies are using MS ADFS 3.0 as Identity Provider (IdP) to authenticate users with SAML2 protocol and all of them are enabled to use ADFS with SuccessFactors (SFSF) too. Also many companies prefer to keep their users managed in the Corporate Network instead of managing users in the cloud services.

This post will show you how it’s easy to configure ADFS to work with SuccessFactors.

ADFS-SFSF-INTEGRATION

Due to the nature of the integration between two or more systems, it’s necessary some explanation about the tasks and responsibilities. The table below is a responsibility matrix, keep in your mind that’s a basic suggestion and the idea is to identify the tasks of each team or person.

Action

TASK

Responsible

1. Configure MS AD FS.

  • Check ADFS availability
  • Validate Infrastructure
  • Provide access from Corporate Network to SuccessFactors Cloud Services

Company

2. Deliver the forms.

  • SAP/SuccessFactors Consultant must request information, certificate and others, thru the form.

SAP/SuccessFactors

3 Fill out the forms

  • The forms must be filled and returned to SAP/SuccessFactors.

Company

4. Cloud Configuration

  • Configure SSO environment as requested in the form

SAP/SuccessFactors

5. Test SSO

  • Provide authentication tests for SSO with SMAL 2.0

Company

6.Validation

  • After the tests the customer team must confirm the architecture and the results.

Company

Keep in your mind that we are considering that MS ADFS is working and do not forget, the MS ADFS must be allowed to handle Web SSO tokens with SAML 2.0. The installation of MS ADFS will not be showed in this post.

Step 1 – MS ADFS 3.0 Version and Patches

I really recommend you to check on the Microsoft site if there are patches to be applied in your environment.

Step 2 – Metadata and certificates from SAP/SuccessFactors

In order to configure the MS ADFS you need to request some files from SuccessFactors. These files will provide a metadata and certificates to be used in ADFS.

Also you need to send the metatada from  ADFS to SuccessFactors. It’s quite simple, just open your browser and use the following URL https://<SERVER>/FederationMetadata/2007-06/FederationMetadata.xml. Do not forget to repalce  <SERVER> with your server address.

Export certificates used by ADFS to communicate, sign and encrpyt is not mandatory, but you can save some time doing it. To export them, open your ADFS Management from Server Manager and follow the sequence below:

adfs-management-access-001-300x205


2.1 In the left side of the ADFS Management has a tree view, click on Service node.

adfs-management-access-002

2.2 Go to Certificates, all certificates will appear in the right side of the ADFS Management.

adfs-management-access-003a.jpg

2.3 Perform and right click on the commnication certificate and choose “view certificate”.

adfs-management-access-004


2.3 In a new window select the folder “Details” and click on button labeled as “Copy to File…”

adfs-management-access-005

2.4 In the certificate export wizard window click on “Next” button.

adfs-management-access-006

2.5 Select the option “No, do not export the private key” in order to export only the Public key. Click on “Next” button.

adfs-management-access-007

2.6 Select BASE-64 encoded X.509 in order to export the certificate as BASE64. Click on “Next” button.

adfs-management-access-008

2.7 Select the path and the file name which will be created.

adfs-management-access-009

2.8 Communication Certificate was exported, click on “Finish” button.

adfs-management-access-010

2.9 Repeat the process for Encryption and Signature certificates, do not forget to give a unique file name for each certificate.

adfs-management-access-011


2.10 Open the file saved for communication certificate and go to Certification Path.


adfs-management-access-013

2.11 In order to avoid missing of information,CA Root in certification path can be exported too. Perform a double click on CA Root.

adfs-management-access-014


Execute the same procedure have you done to export others certificates.

adfs-management-access-015


These files will be sent to SAP/SFSF together with the metadata xml file.

Step 3 – Configure MS ADFS

3.1 Open ADFS Management (Start the ADFS Management in the server) and start the wizard to add a Relying Party Trust for SFSF Cloud Service

adfs-1a.gif

3.2 Select option “Import data about the relying party from a file”

adfs-1b

3.3 Add the configuration from Metadata.xml file

adfs-1c.gif

3.4 Specify the display name of the Claim

adfs-1d

3.5 Check the option “Permit all user to access this relying party”

adfs-1e

3.6  Confirm the certificate for Encryption

adfs-1f


adfs-1g

3.7 Flag this option in order to configure the Claim Rules

adfs-1h.gif

3.8 Click on “Add Rule” button to create new rules. Two new rules must be configured in Claim Rules

adfs-1i

3.9 The new rule is related to LDAP attributes; Therefore choose “Send LDAP Attributes as Claims” and click on “Next”

adfs-1j
3.10 Define the rule name as you want, choose Active Directory in the attribute store. In the mapping select SAM-Account-Name for LDAP Attribute and choose Given Name for Outgoing Claim. Click on the “Finish” button.

adfs-1k
3.11 Create another rule

adfs-1l

3.12 Choose the option “Transform an Incoming Claim” and click on “Next”

adfs-1m

3.13 Give some name for the rule. Incoming type is “Given Name” and outgoing type is “Name ID”. Outgoing name ID forma must be “Unspecified”. Finish this configuration

adfs-1n

3.14 Close this window clicking on OK button

adfs-1o

 3.15 Close MS ADFS window and enjoy your SAML2 provider.

It will work only after the SuccessFactors has finished the configuration of their environment.

In the same way MS ADFS can be configured to provide identity for SAP NW GATEWAY and SAP PORTAL.


What’s New in SAP NetWeaver 7.5

According to SAP the SAP NetWeaver 7.5 enables technology trends like the Internet of Things (IoT), mobile, cloud, big data and analytics. The main objective is speed up the development of simple business applications.
I found some important topics which were summarized in this post. Let’s take a look into SAP NW 7.5 and see some main changes.


I think the most important point for Portal, PI/PO and BPM consultants is the Java 8 features, let’s see some security features:

  • Client-side TLS 1.2 enabled by default.
  • Stronger algorithms for password-based encryption.
  • SSL/TLS Server Name Indication (SNI) Extension support in JSSE Server.
  • The SunJCE provider is enhanced to support AES/GCM/NoPadding cipher implementation as well as GCM algorithm parameters.
  • SHA-224 Message Digests.
  • Kerberos 5 weak encryption types disabled by default.

You can see the Best Practices for NW ABAP 7.5 on my SCN BLOG Site.

Best Regards,

Alex Belle.